DevLink is an application developed by Webflow Labs that lets us build components in Webflow for use in React projects. I've been curious to try it out for the longest time, but basically forgot about it until a few weeks ago when I decided to develop a new personal site.
DevLink integrates perfectly with Next.js, a React framework that can be used as a static site generator. It's not my favorite SSG (I actually enjoy Eleventy faaar more), but being able to use Webflow to build my components makes it an obvious choice.
Anyway, my idea was the following:
- Design & develop all React components in Webflow
- Export the components and develop the site in Next.js
- Use Obsidian (markdown writer) as a CMS
- Deploy the whole thing on Netlify
And so I did.
In fact, the site you're visiting right now is the site I built. The whole project consists of a Webflow project a Github repo. While the code on Github currently is private, feel free to take a look at the Webflow project.
This article will quickly go through the workflow of developing a site with Webflow, DevLink & Next.js. It's not a step-by-step guide by any means, but instead a collection of insights and pointers of building a site using these tools.
Let's go.
Understanding the tools
Let's start by quickly going through each tool one by one.
Webflow
Webflow is a visual web development tool. It lets us develop components that acts as reusable "pieces" of the front-end/user interface of a website and/or web application.
Next.js
Next.js is a framework for developing websites or web application in React.js. Next can be used as a static site generator that pre-builds all pages of a website before deployment. The output is basically just static HTML, CSS & Javascript files.
This method of development removes the need of databases, content management systems etc.
DevLink
DevLink lets us setup a connection between a Webflow project and a local Next.js project. You're able to export (or sync) all components from your Webflow project and use them directly in Next.js.
DevLink also syncs all interactions from your Webflow project, which I think is super cool.
Obsidian
Obsidian is a super-minimal markdown writing tool that works with local markdown files. I use it as a local "CMS" for these types of static sites.
Netlify
Netlify is a deployment platform that works amazingly together with static site generators such as Next.js.
Github
Github acts as the cloud repository for the whole site. It lets Netlify build the site directly from your repository.
Setting Up Your Dev Environment
This guide assumes that you're already somewhat familiar with React, Github, IDE's, terminals etc.
Start
To get started, we need to do the following:
- Apply for the DevLink open beta with your Webflow email
- Create a new Webflow project
- Create a new Next.js project
- Create a new Github repo and commit your Next project
- Create a new Netlify project with your Github repo
DevLink connection
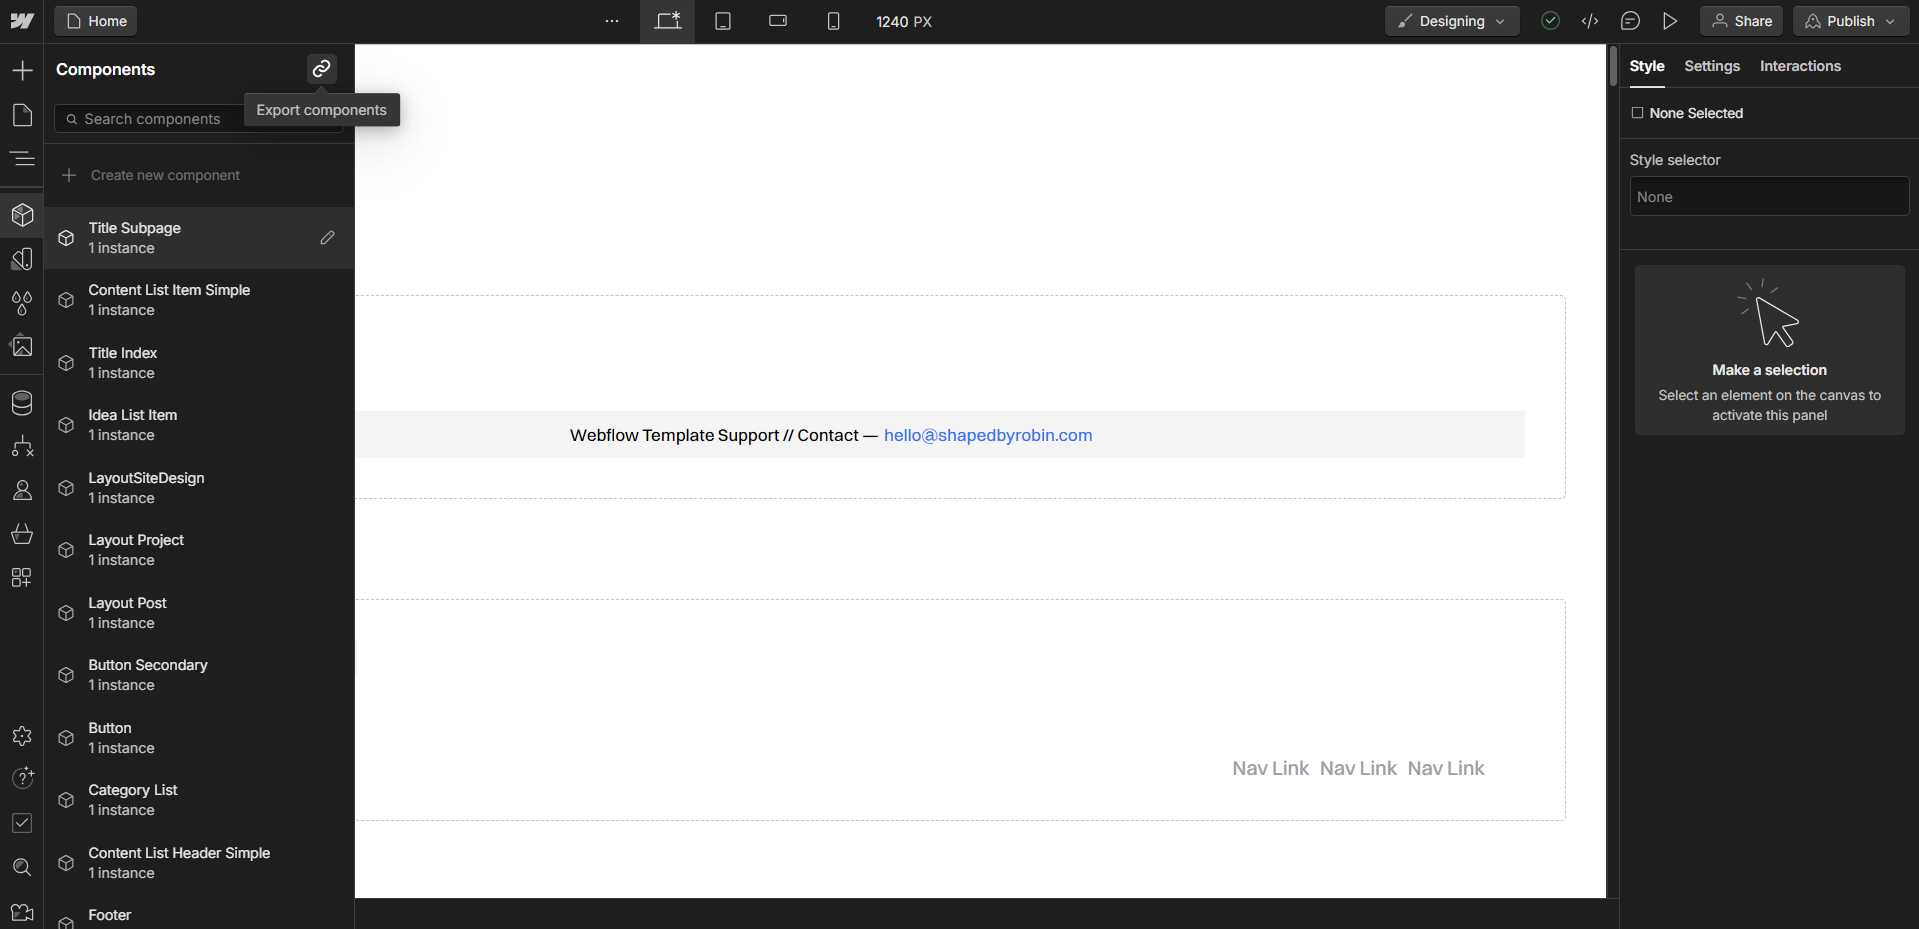
Connecting your Webflow project with your local Next.js project is fairly simple. Start by creating a component in your Webflow project. This can be anything, we just need a component to access the little link icon in the components tab to the left in the designer.
Webflow will give you step by step instructions to establish the connection with your own credentials, except for your projects' auth token. This token can be found under the integrations tab in the site settings of your project.
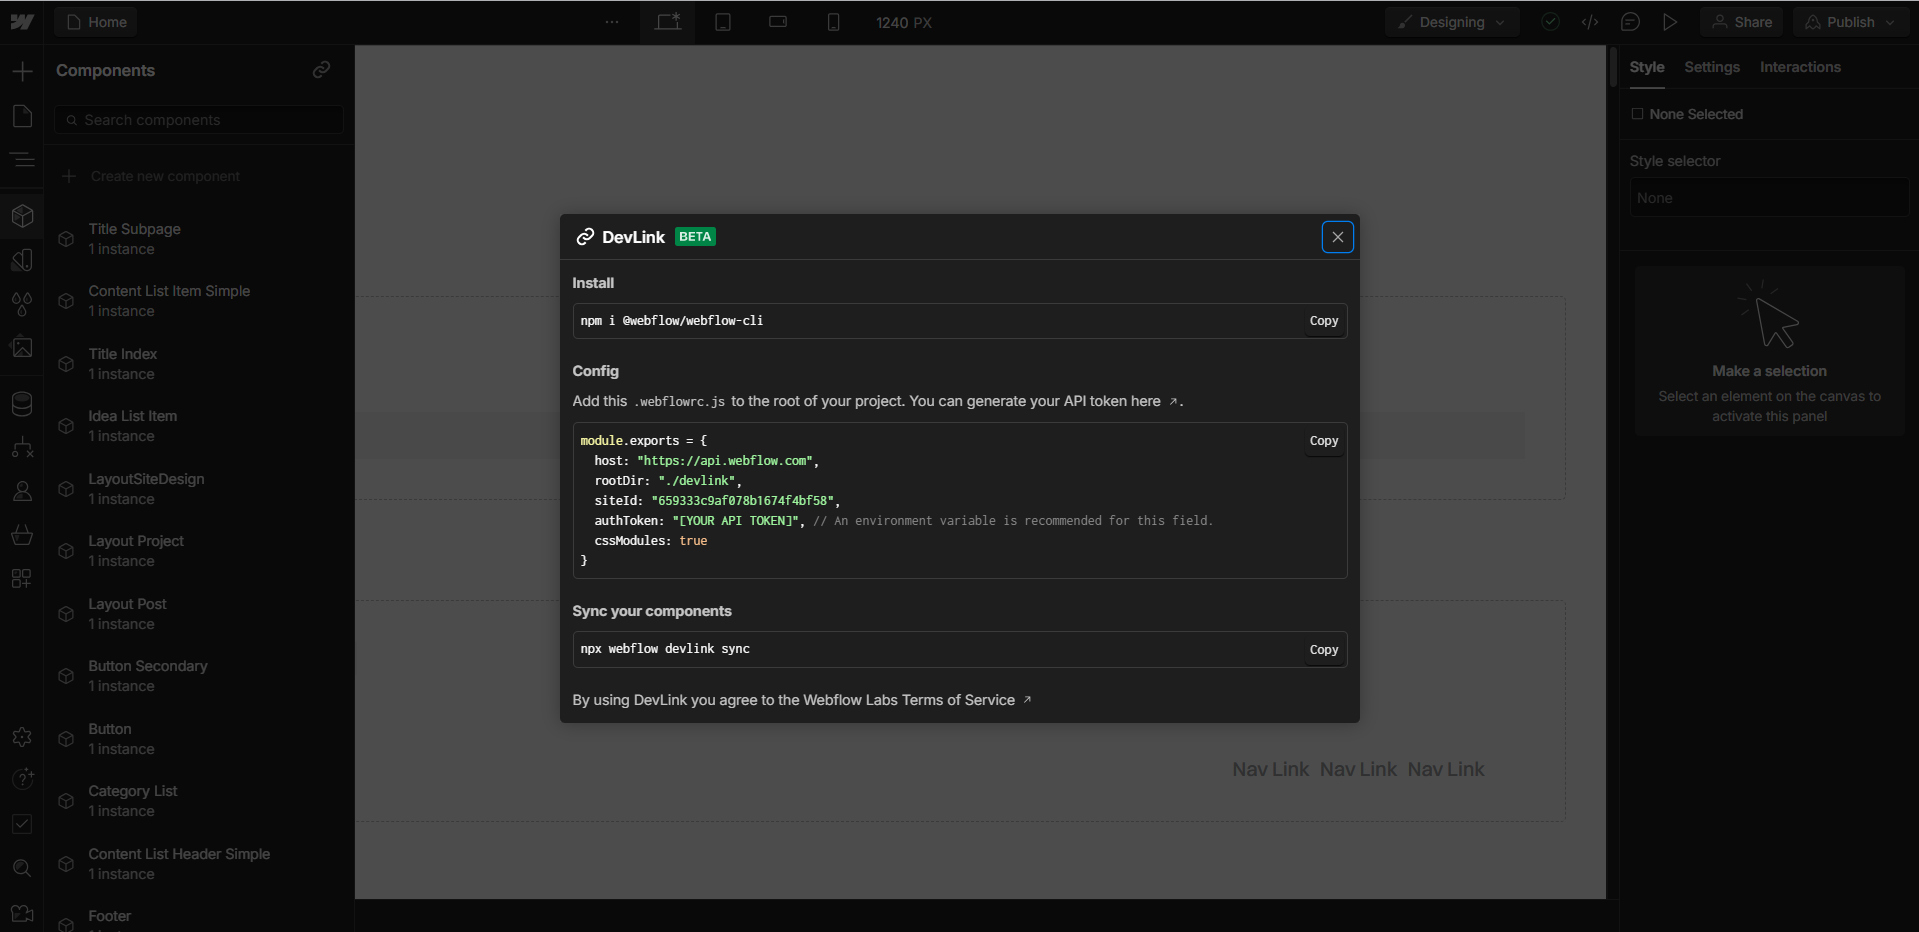
To establish the connection:
- Start by installing the DevLink CLI in your Next.js project
- Create a .webflow.js file in the root folder with your config credentials
- Sync the components using the sync command
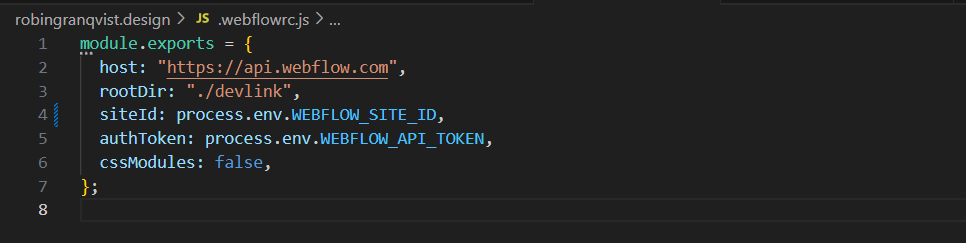
Please note that your Webflow auth token absolutely shouldn't be commited to your Github repo. Instead, create a .env file and set the auth token as a new environment variable.
This environment variable can then be imported in your .webflowrc.js file like so:
Minor sync quirk
One little quirk I've noticed is that the sync command sometime fails to sync all CSS updates. To solve this, I've created a new sync command in my package.json file called "sync" that syncs everything twice. It looks like this:
"sync": "npx webflow devlink sync && npx webflow devlink sync"
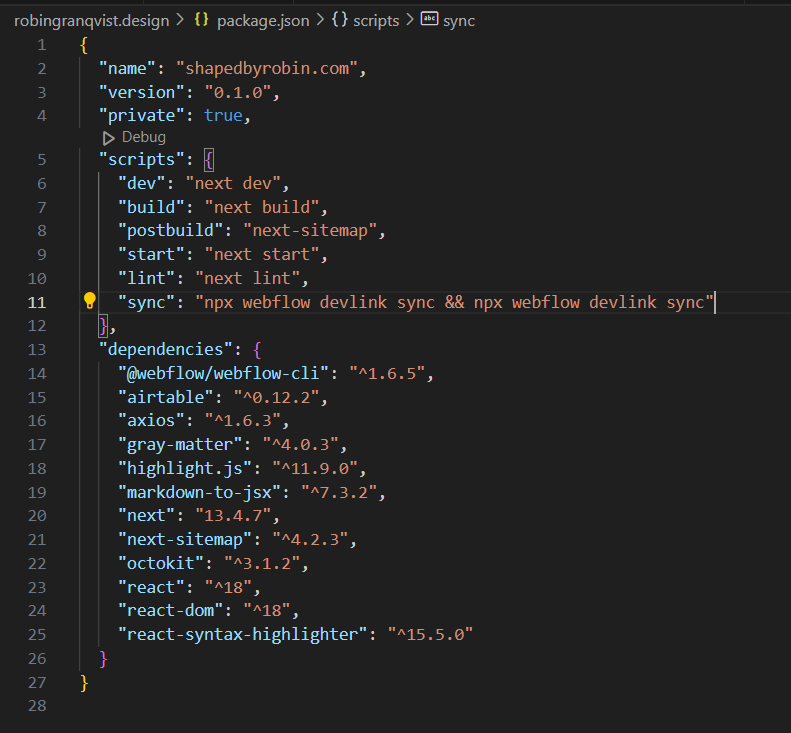
Now we're able to run "npm run sync" in the terminal and everything will be synced correctly (most of the time).
The workflow
There are a couple different approaches you could take when developing your site in Webflow.
- One approach could be to build out the whole site in Webflow, split each section into components, give each component a few properties and reuse the section components throughout your site.
- Another approach is to develop your Webflow project like a UI kit consisting of smaller components (buttons, accordions, whatever) and puzzle it all together in your Next project.
I chose to go with a combination of these two.
- Some components are really small, such as buttons, list items and nav links
- Other components are full section layouts for different pages
- There's also a few "middle ground" components such as titles and lists.
Style guide
The first thing I did was to setup a super simple style guide. This style guide mostly contains typography elements and colors, similar to what you would see in a typical Webflow template:
- Headings (H1-H6)
- Display headings (2XL-2XS)
- Paragraphs & links
- Rich text typography elements
- Images
The cool thing about using DevLink is that any classes created in you Webflow project gets synced with your Next.js project.
TitleIndex component example
Let's take a look at what my component TitleIndex looks like inside Webflow:
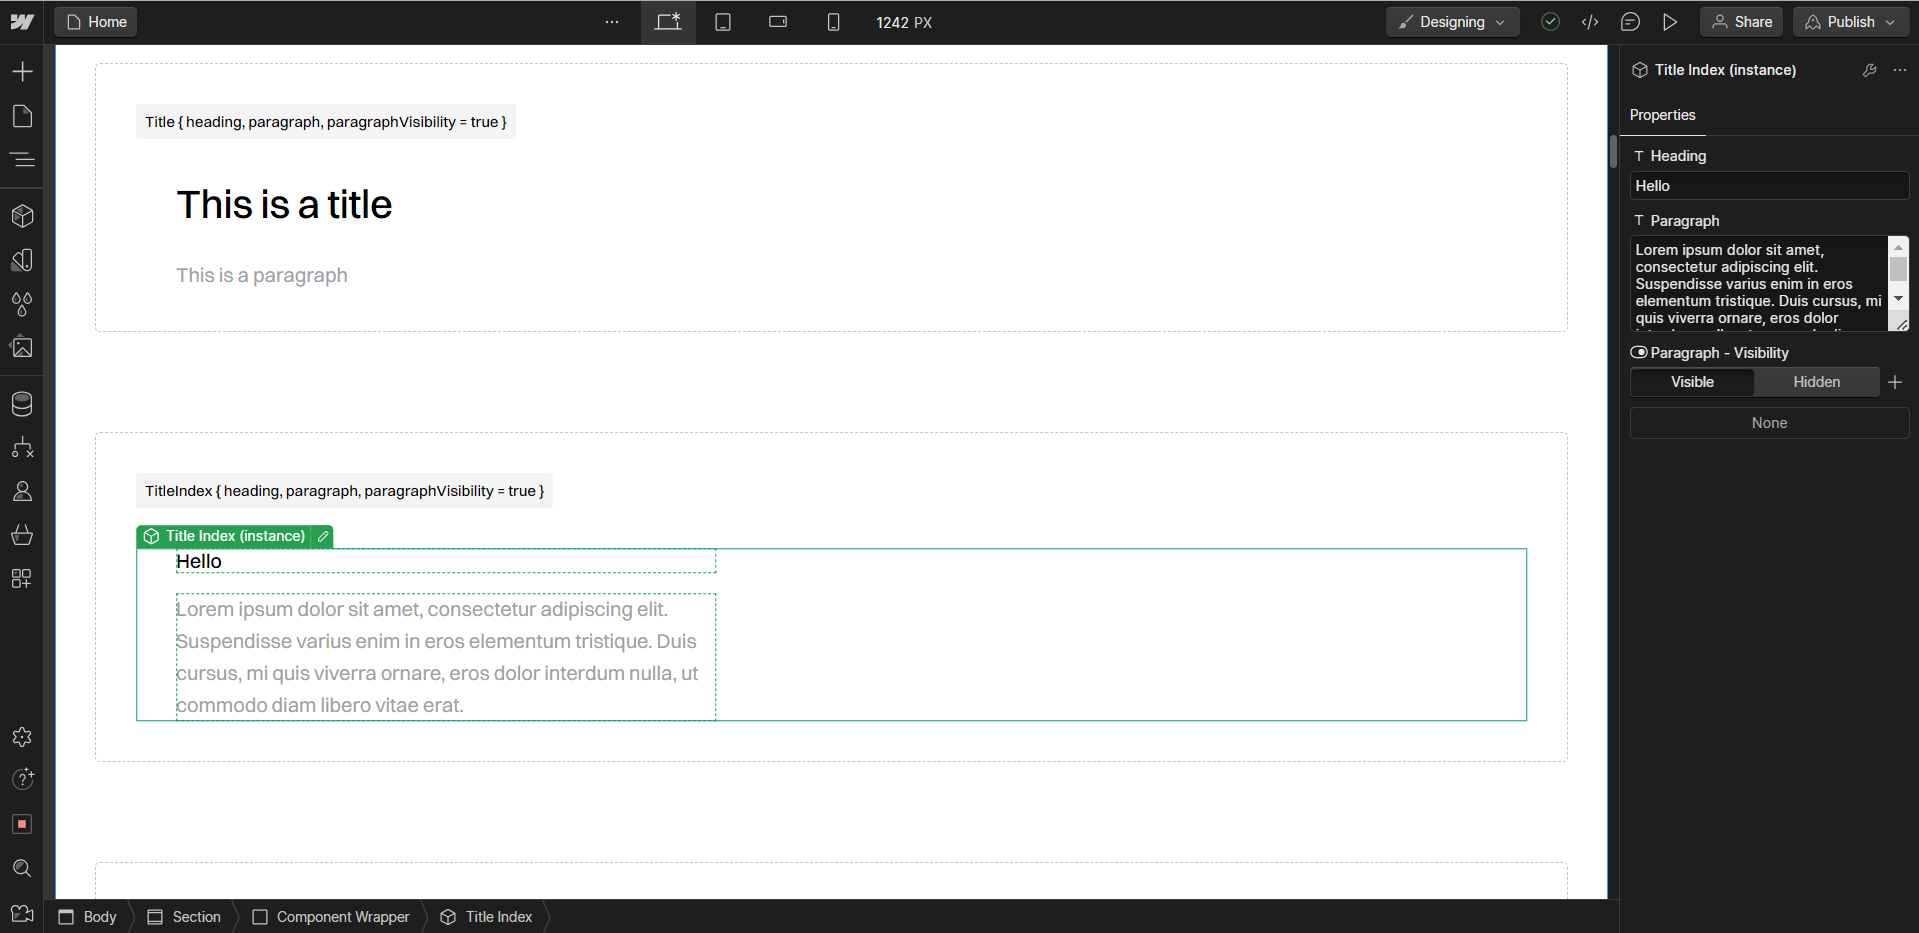
Its a super simple components with 3 props:
- heading
- paragraph
- paragraphVisibility
The prop names are pretty self explanatory. It's basically a reusable title component for which I can send in a unique heading and paragraph for each instance, as well as hiding or showing the paragraph depending on where it's used.
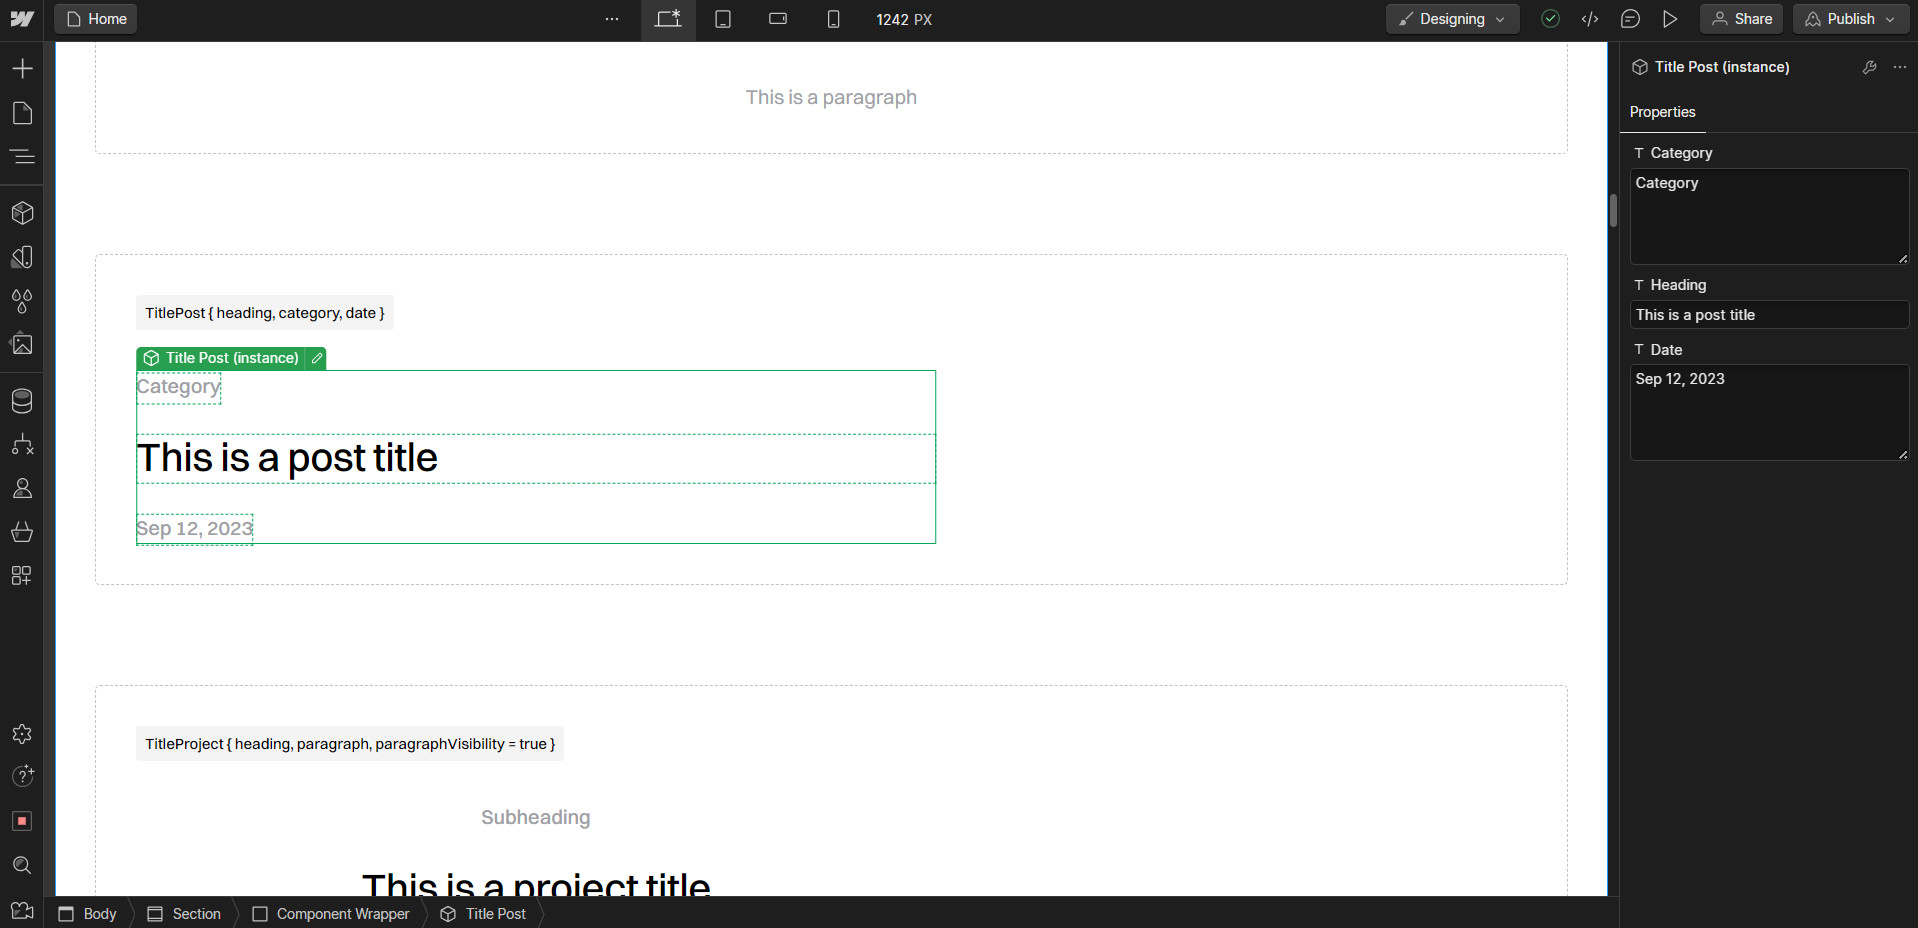
Title component variations
I also have a few variations of this the title component. Since we're not able to modify the styling itself using props in Webflow, this was the solution I came up with for other types of titles.
This is a left aligned title for post pages, with category and date props:
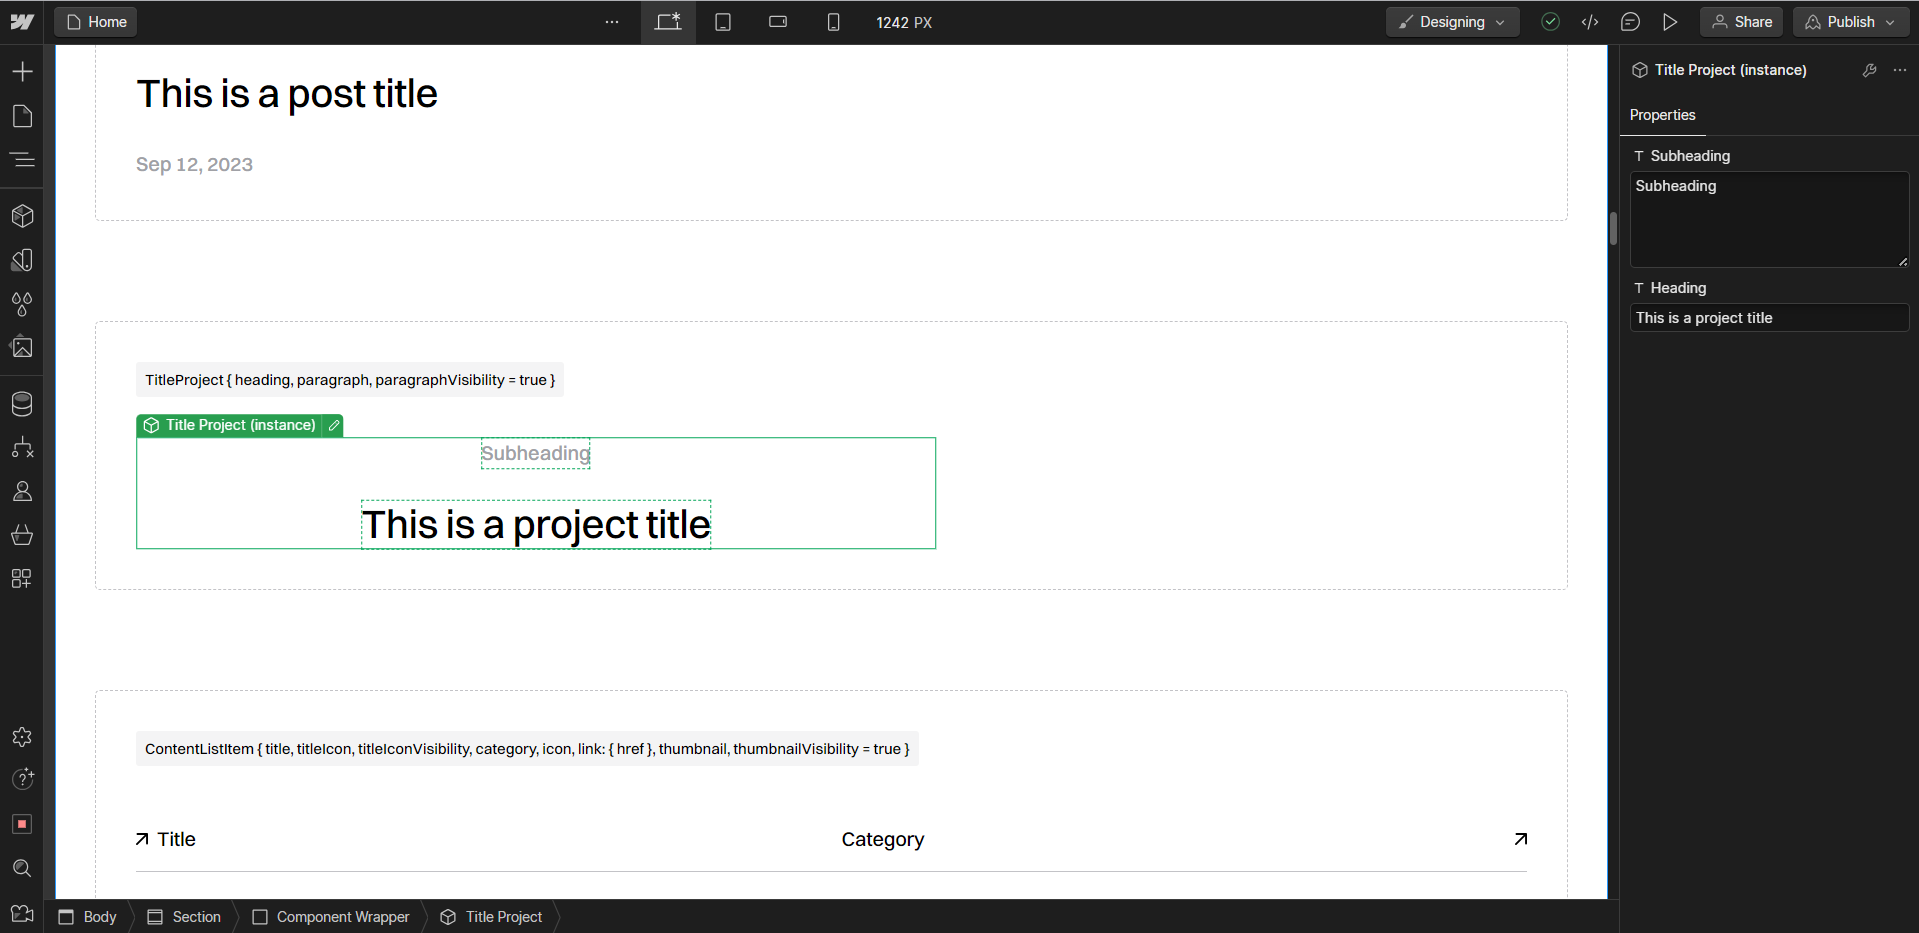
This is a centered variation for project pages:
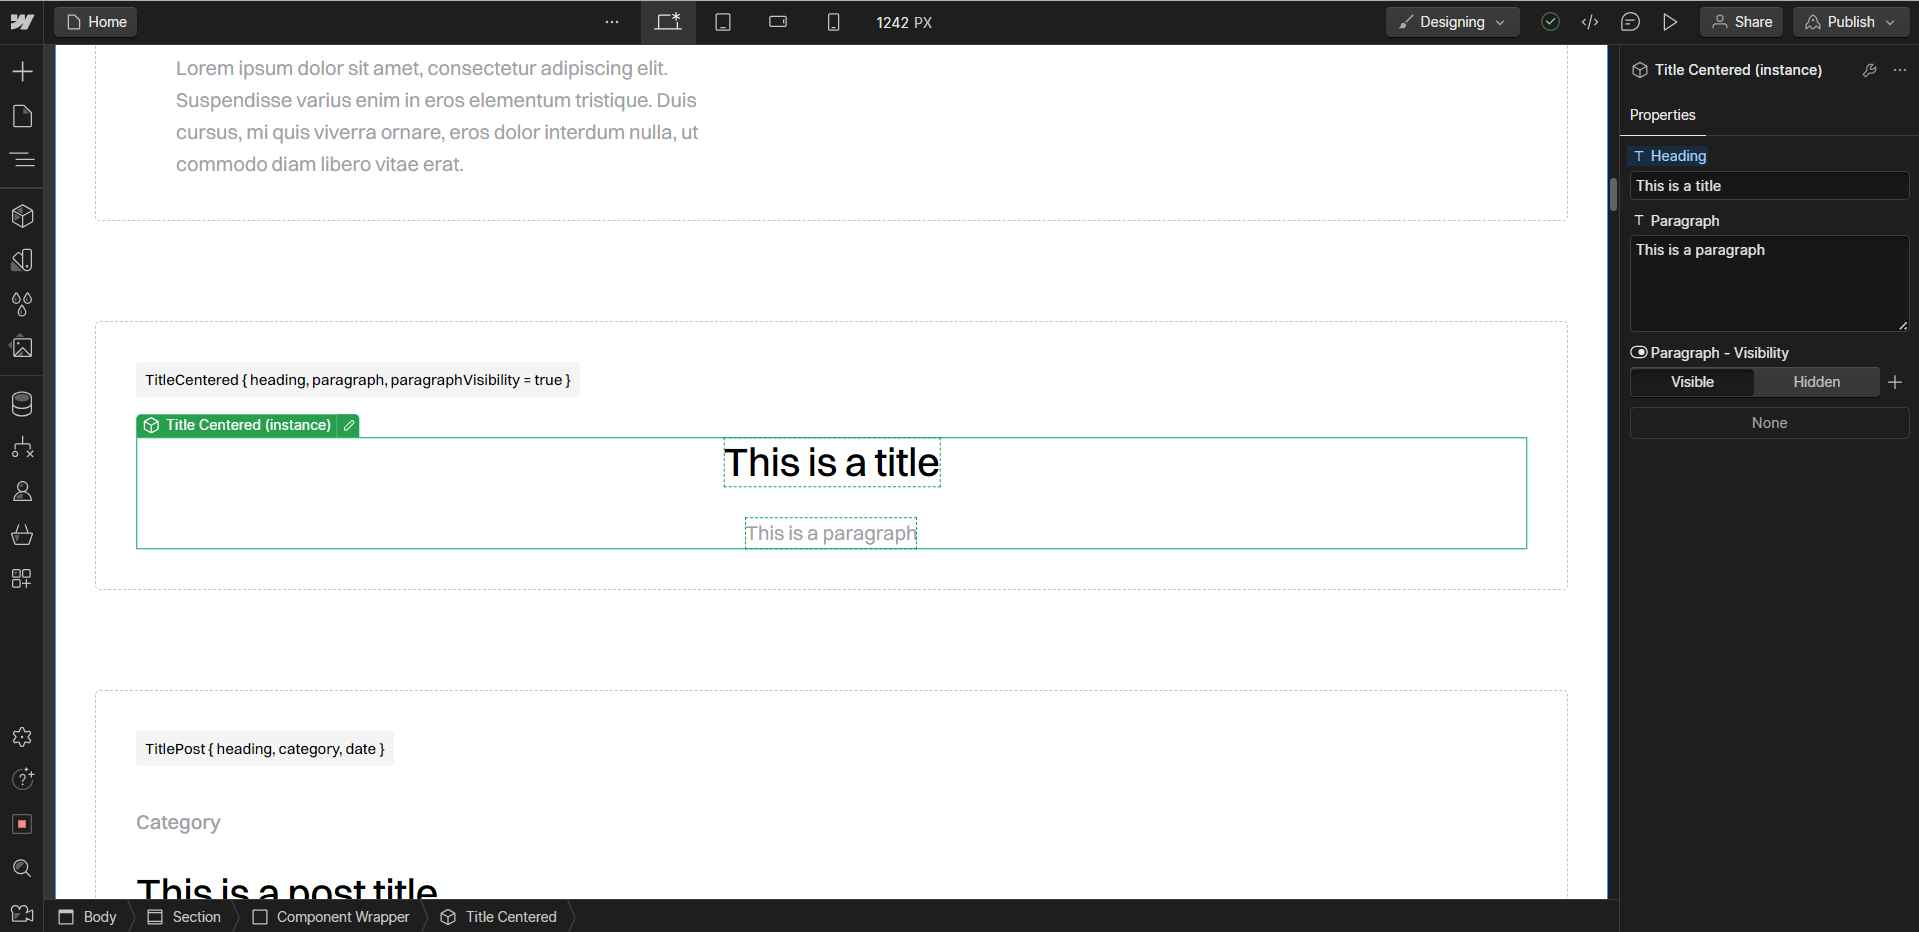
This is a full width centered title variation:
Other component examples
The ContentListItem component is probably a bit more interesting. This component is used for lists of templates, posts or any other type of list on my site (my site has a lot of lists):
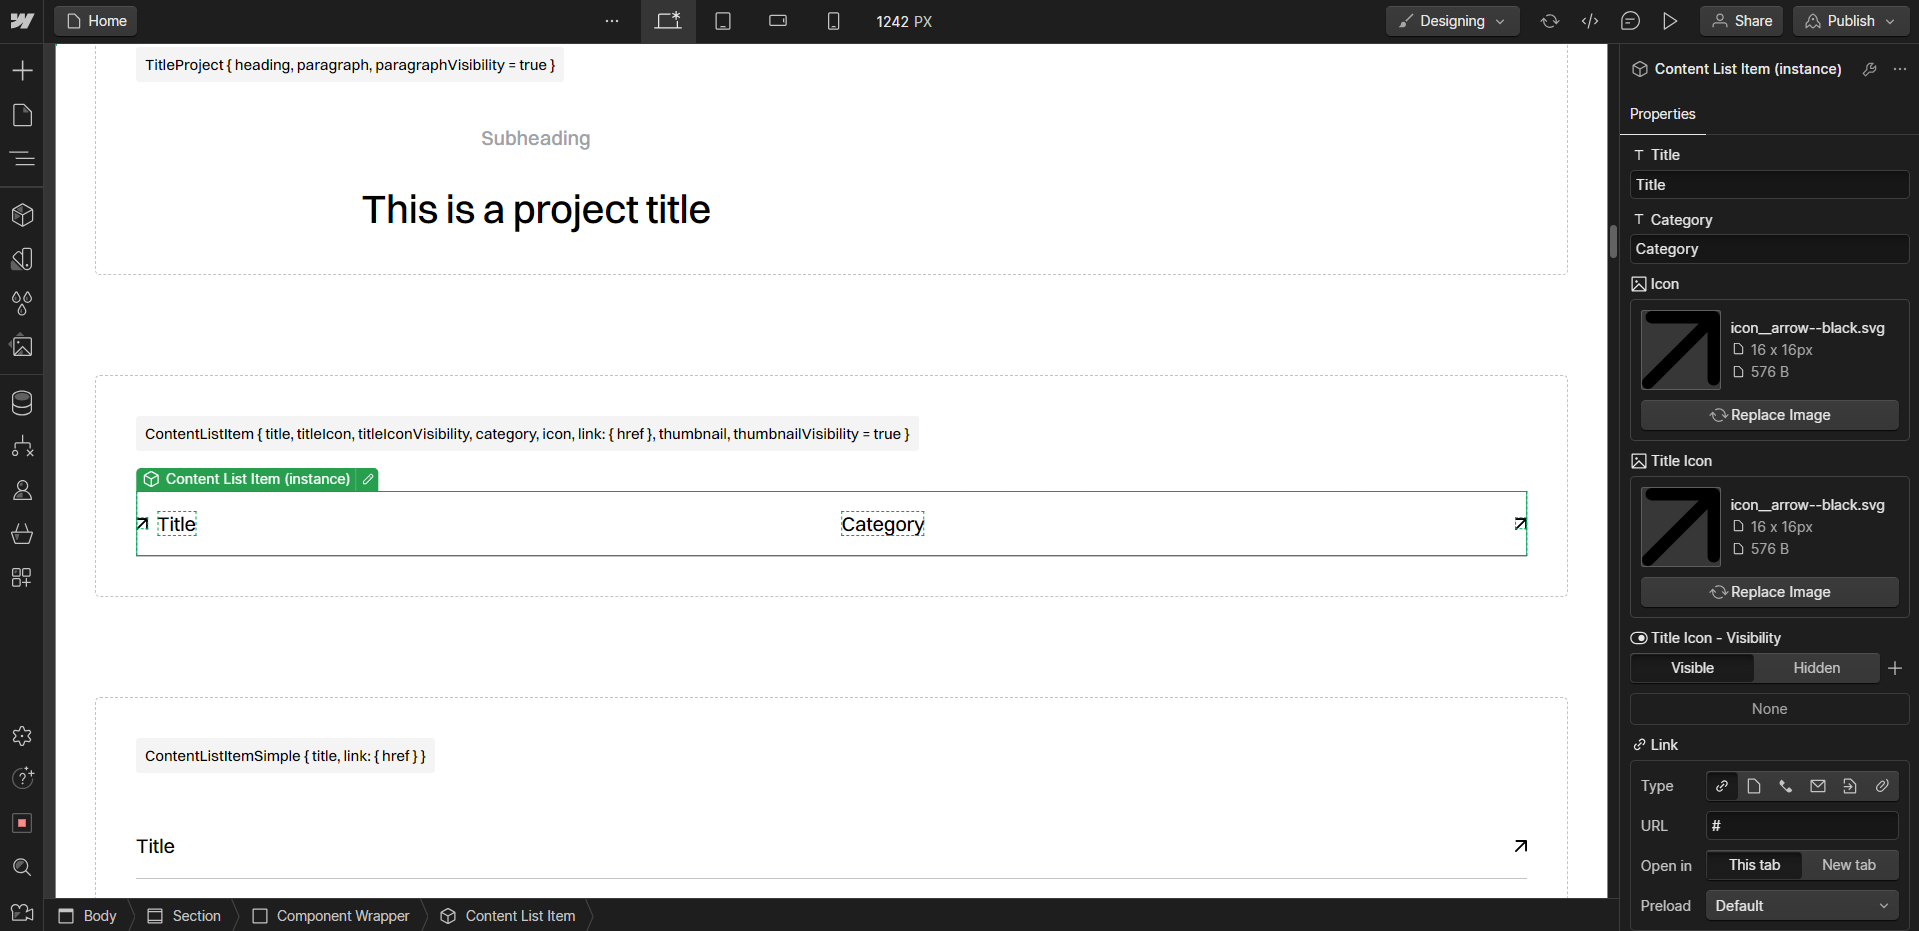
The ContentListItem component has a few more props than the titles:
- title
- titleIcon
- titleIconVisibility
- category
- icon
- link
- thumbnail
- thumbnailVisibility
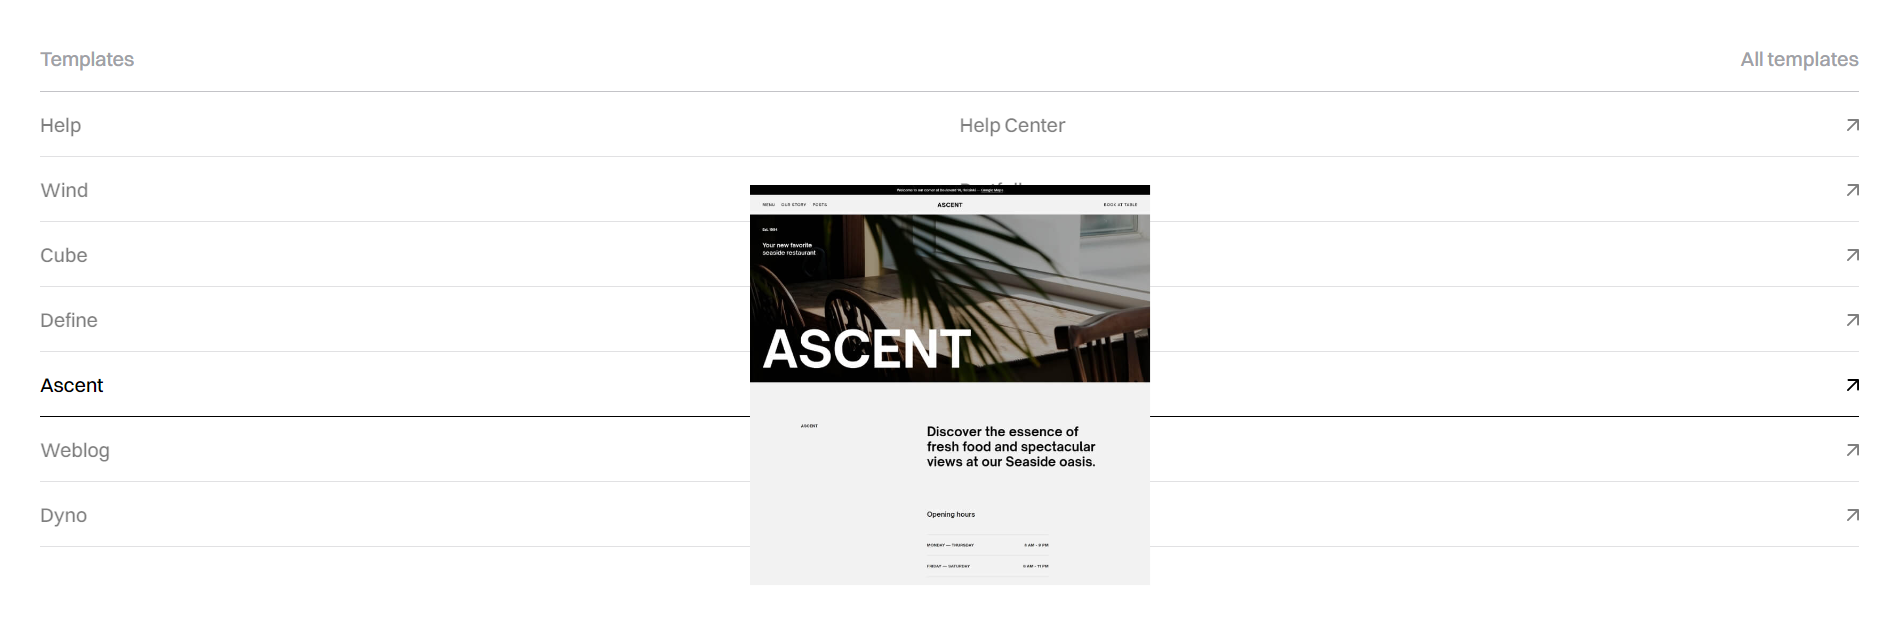
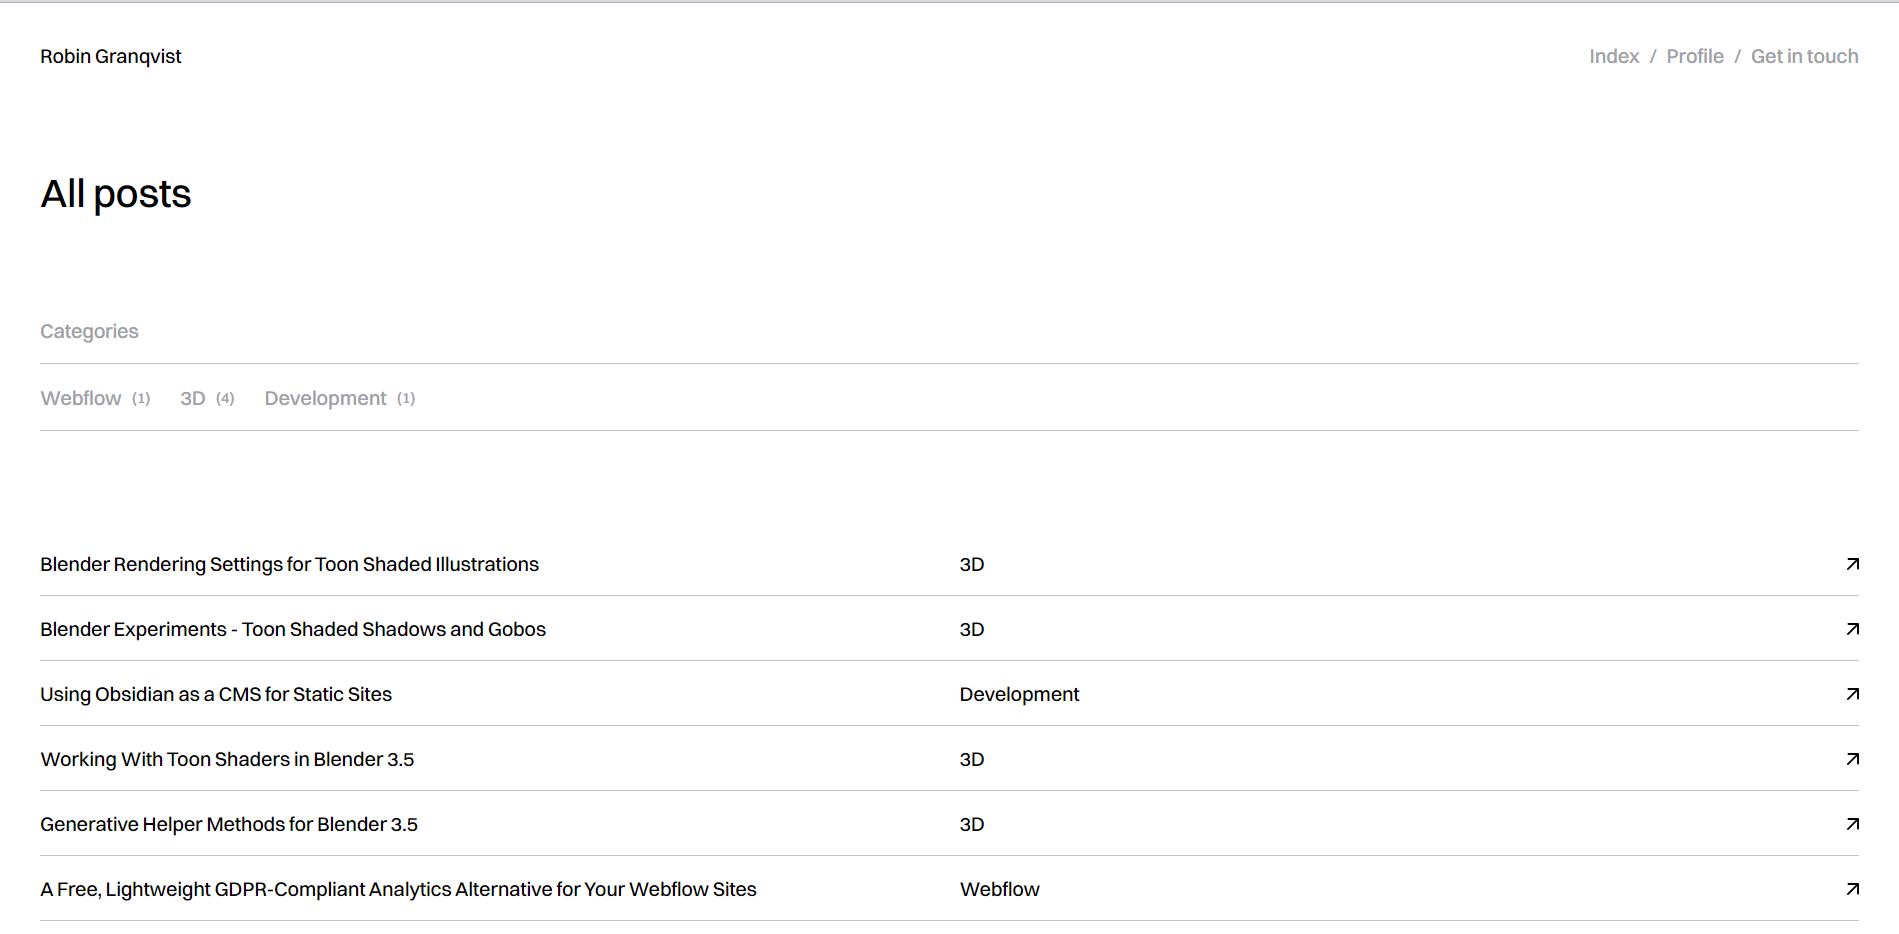
If we look at the component itself, we can see that there is a title, an icon for the title, a category and an icon to the right. It also has a optional interaction that displays the thumbnail when hovering it. It looks like this on the live site:
When developing components, we want to make them somewhat modular. If we want to reuse them, we might need to be able to add or remove certain elements to make them fit different use cases.
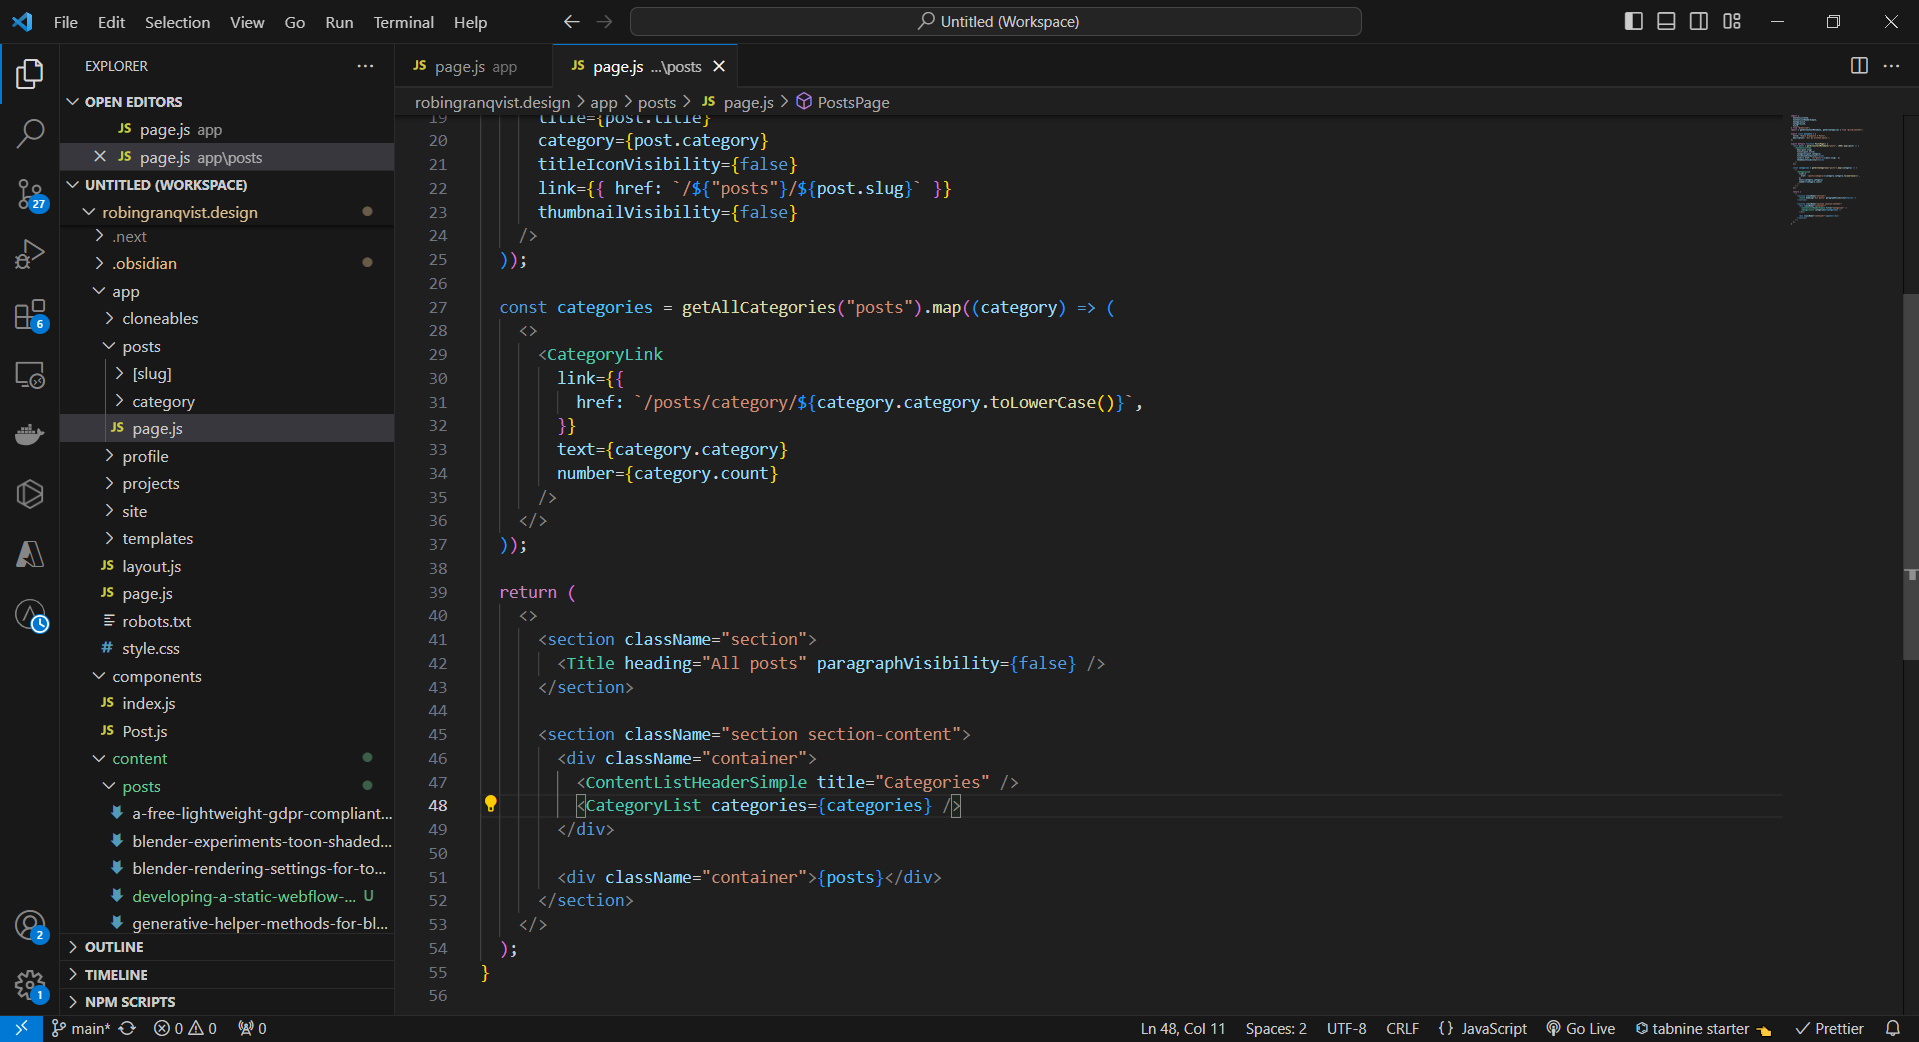
This component is used for all list items on the homepage, and this is what it looks like in code.
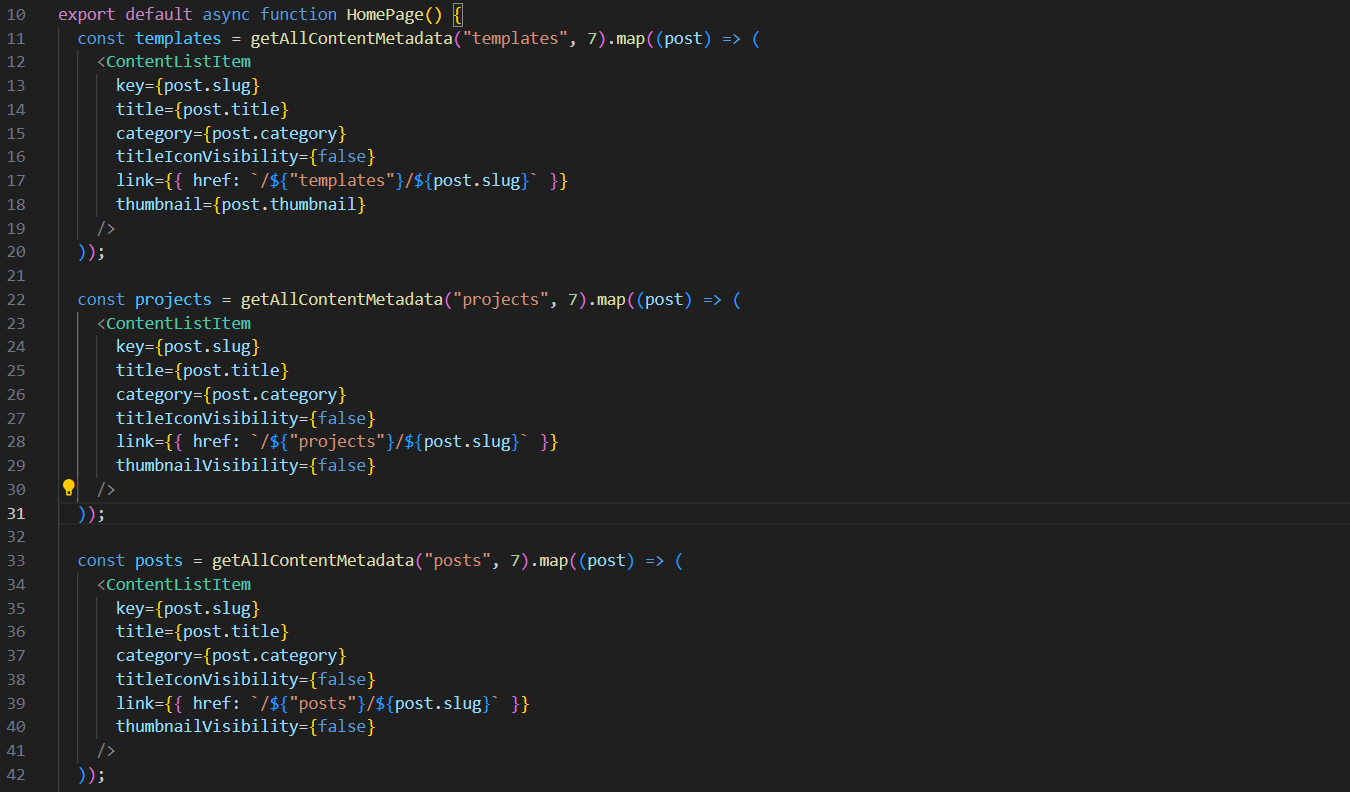
If you look closely, you can see that the "thumbnailVisibility" is set to false on both "projects" and "posts" list items. This simply hides the thumbnail hover interaction that's visible for template list items.
Components with slots
Slots is a Devlink feature that lets you use components inside another components. Let's take my CategoryList component as an example.
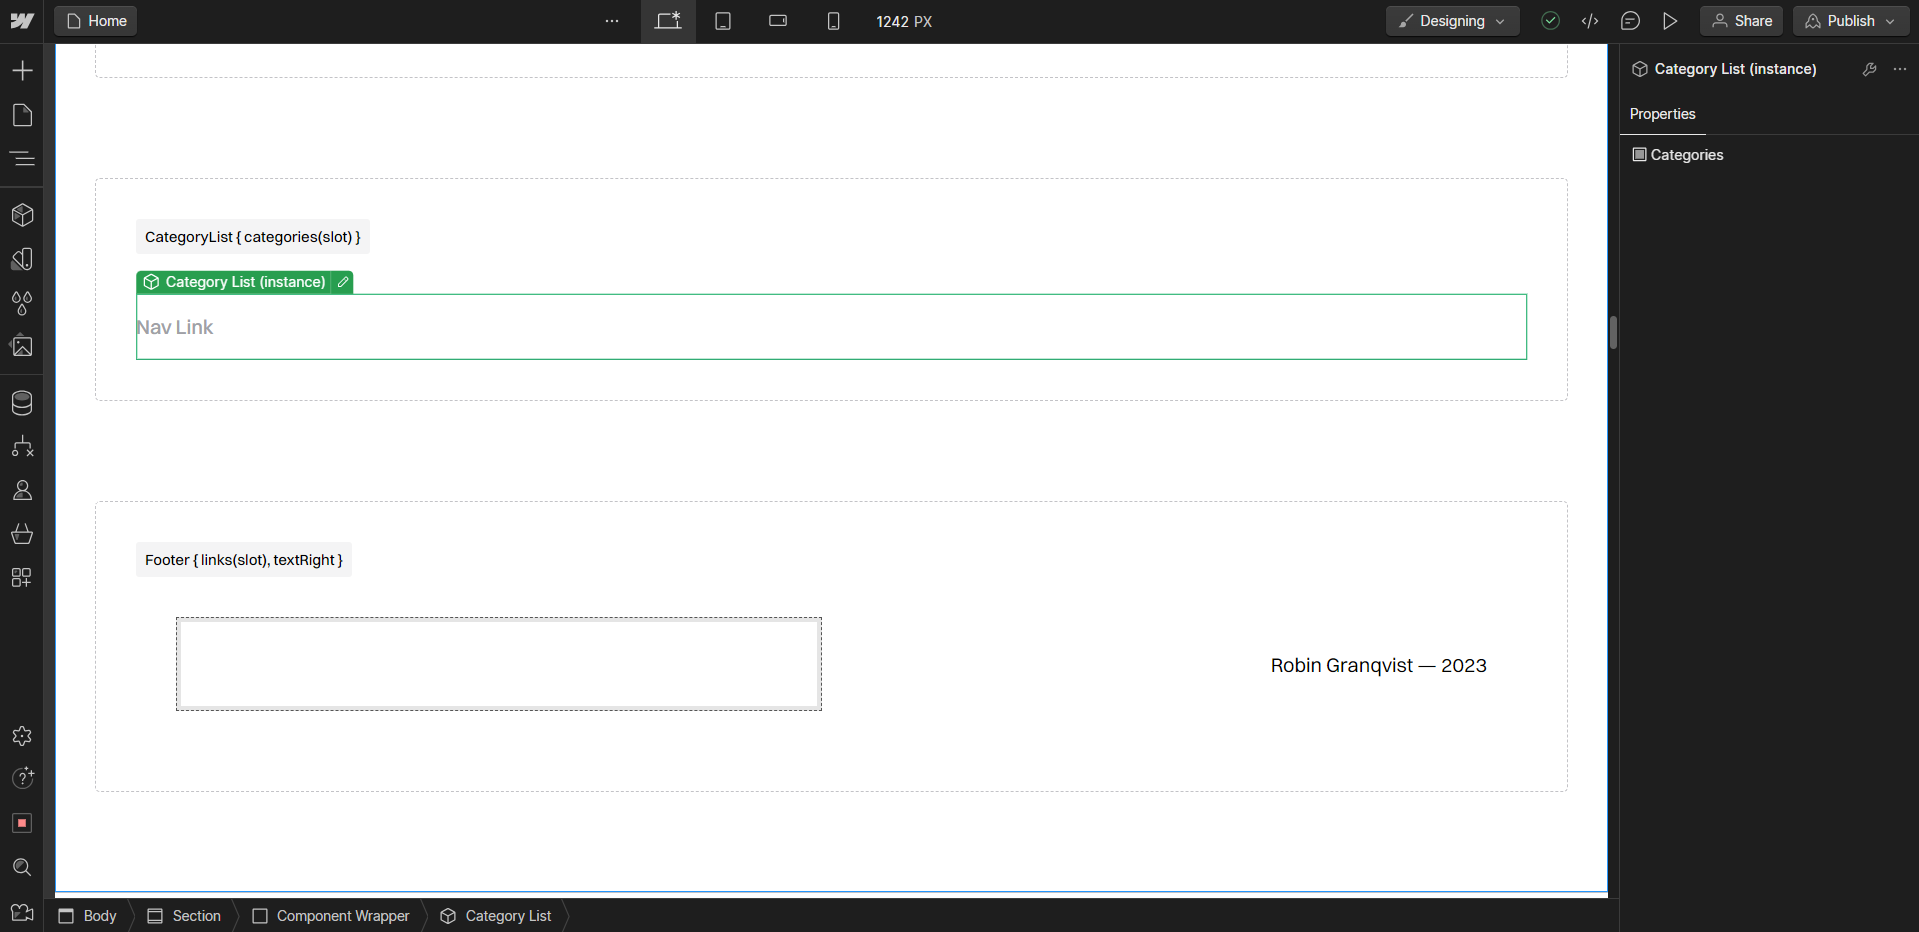
This component only has one property called Categories. This property is a slot that lets me populate the CategoryList with multiple CategoryLink components, which together creates a dynamic menu of categories.
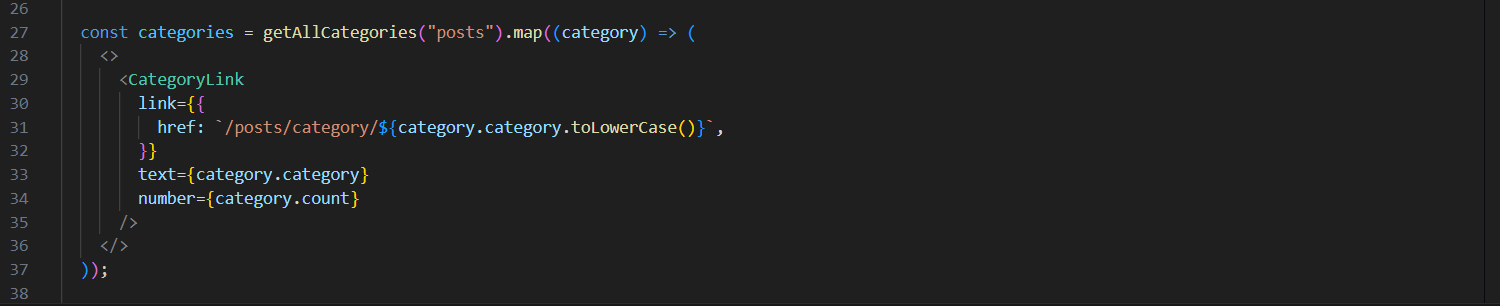
If we look at the code, we can see that I create a component called categories containing multiple CategoryLink components.
This categories component is then sent in as a prop into my CategoryList component.
This results in this simple menu on the live site:
Developing your site in Next.js
I would love to write a comprehensive tutorial on developing a full site in Next.js, but it would take forever. Instead I'll just show a few quirks that could be good to know.
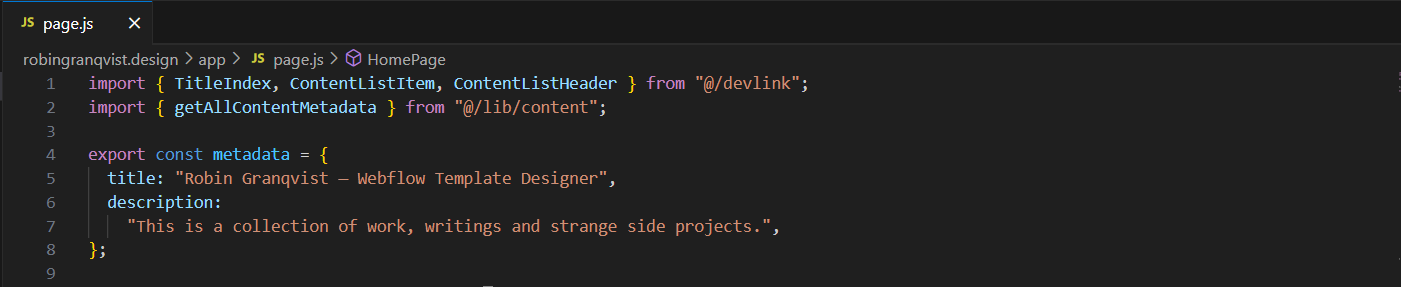
Importing DevLink components
All DevLink components are client components that can be imported directly into Server components without problems. This is not true the other way around, but DevLink makes sure to add the "use client" keyword to all imported components.
Importing multiple components into a page might look something like this:
DevLink folder alias
Please note that I've created an alias for the /devlink folder in my jsconfig.json file. It looks like this:
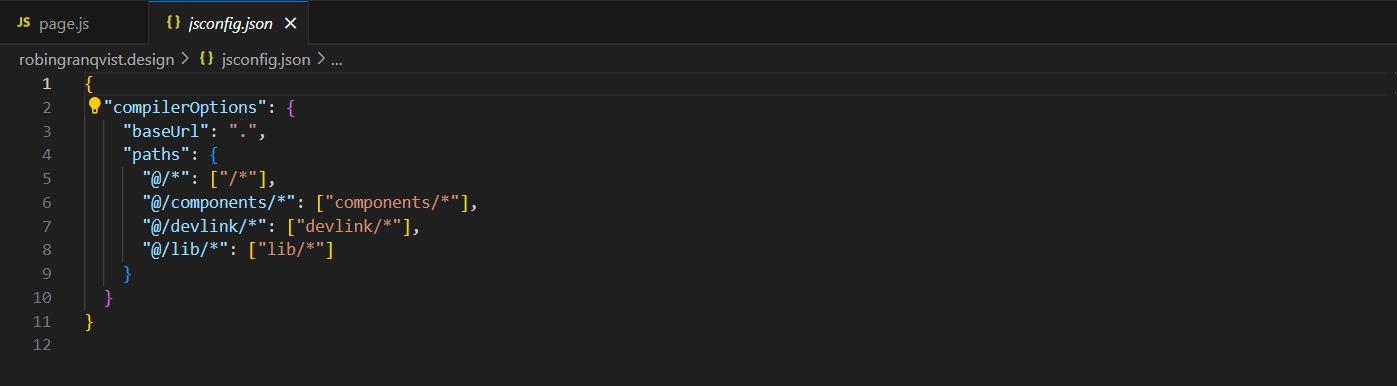
This simplifies the imports just a tiny bit.
DevLink component links
Something I struggled with a bit in the beginning was to get links to work correctly for my DevLink components. All link props has their own property called href in which the link should be placed.
My CategoryLink component looks like this:
DevLink currently doesn't support Lottie animations
Lottie animations is the only unsupported Webflow feature I've found so far while using DevLink. I'm sure there are other features missing, but for my usecase it's all good.
Next version 13.4.7
I don't know why, but for some reason this is the only version I got working correctly with the app folder and the getStaticParams function for building the site as a static site.
There's some threads up on Github complaining about similar issues I experienced, so for now, just use this version and you'll be good.
Using markdown content
In order to work with markdown in Next.js, we need some kind of markdown parser. I'm using markdown-to-jsx that seems to work alright.
This is what my Post component looks like (a component that renders markdown posts).
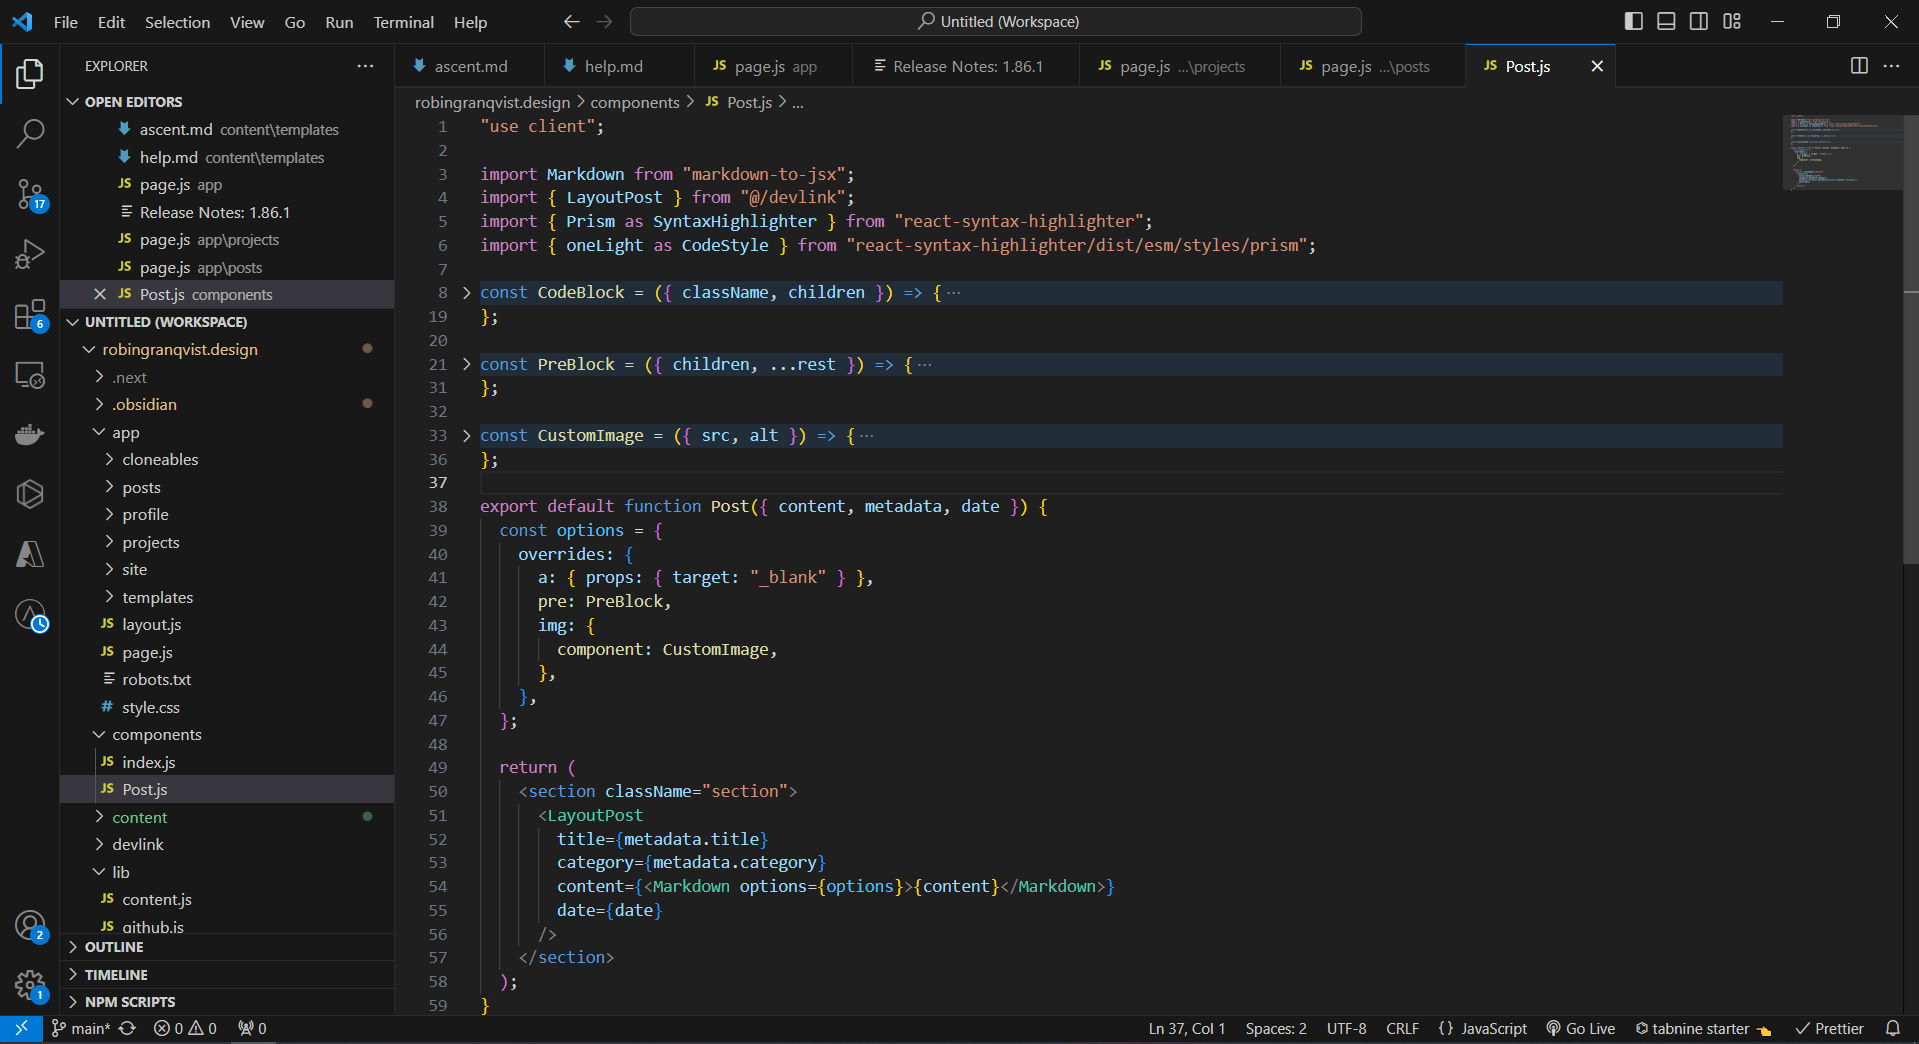
The LayoutPost component is a Webflow component that takes a title, category, a date object and the parsed markdown content itself to display a post.
The CodeBlock, Preblock and CustomImage components are simply some optional settings used for syntax highlighting and custom image paths (for Obsidian).
Creating a sitemap with next-sitemap
Creating a full sitemap in Next is super easy by using the next-sitemap npm library.
Simply install it, create a next-sitemap.config.js file with some boilerplate settings, add a postbuild script in your package.json, and Netlify will automatically trigger the build of the sitemap when deploying your site.
Deploying on netlify
Deploying a static generated Next.js project on Netlify is fairly straightforward. You simply have to authorize and link your Github repo with a new Netlify project, and Netlify will understand that the project is developed in Next.js.
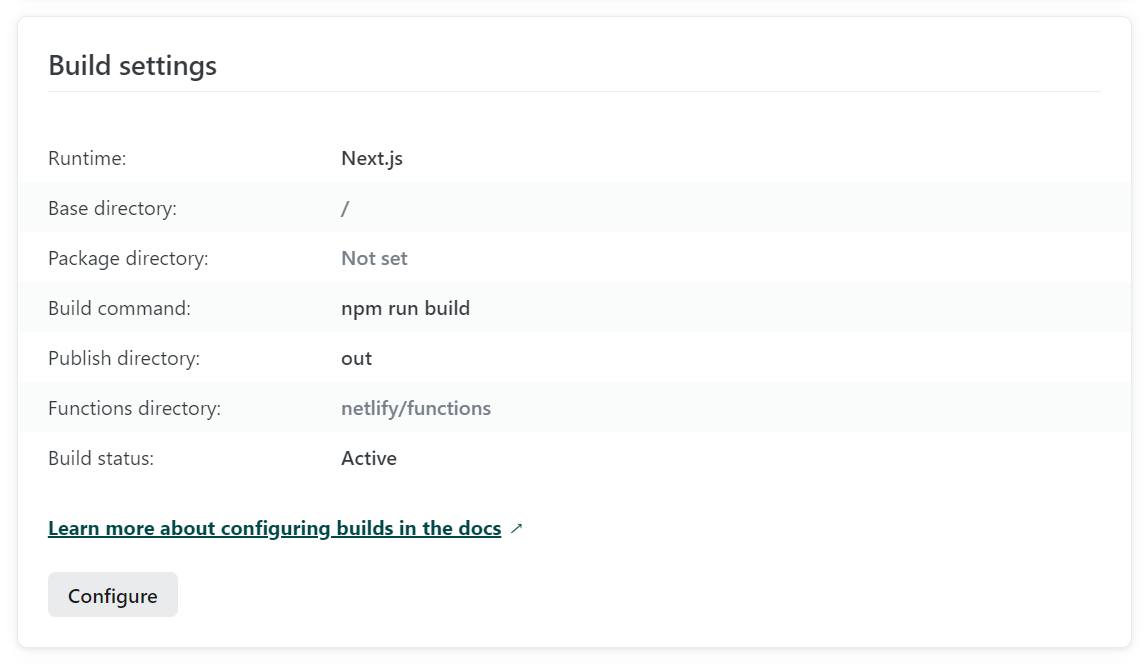
Deployment settings
There's a couple settings you should make sure are correct in your deployment settings:
- The publish directory should be /out
- The build command should be npm run build
- If you're syncing your components before build on Netlify itself, remember to add your Webflow auth token as an environment variable in Netlify
Conclusions
Okay that's it. I really like DevLink so far.
Hopefully you found some value in this "guide". Make sure to take a look at DevLink yourself and go build some cool stuff.
If you have questions regarding DevLink, Next.js, static sites or other things related to this article, feel free to email me. You'll find my email over on the /profile page.